Mastering Document Clarity: How To Remove A Markup Area In Word
In the world of digital documentation, clarity and presentation hold paramount importance. When collaborating on a Word document, you may encounter markup areas—those highlighted sections that indicate comments, revisions, or suggestions. While these features are invaluable for editing and feedback, they can clutter the document and detract from its readability. Learning how to remove a markup area in Word can streamline your documents and enhance their professional appearance.
Understanding how to navigate and manipulate these markup areas can significantly improve your workflow. Whether you're preparing a final draft for submission, creating a polished presentation, or simply tidying up your work, knowing how to effectively remove unnecessary comments and markup areas is essential. This guide will provide you with step-by-step instructions to ensure your document remains clear and concise.
As we delve into the process of removing markup areas in Word, you’ll discover various methods that cater to different needs. From eliminating individual comments to clearing all markup at once, this article will equip you with the tools to maintain a clean document. Get ready to enhance your document's clarity and professionalism by learning how to remove a markup area in Word!
What Are Markup Areas in Word?
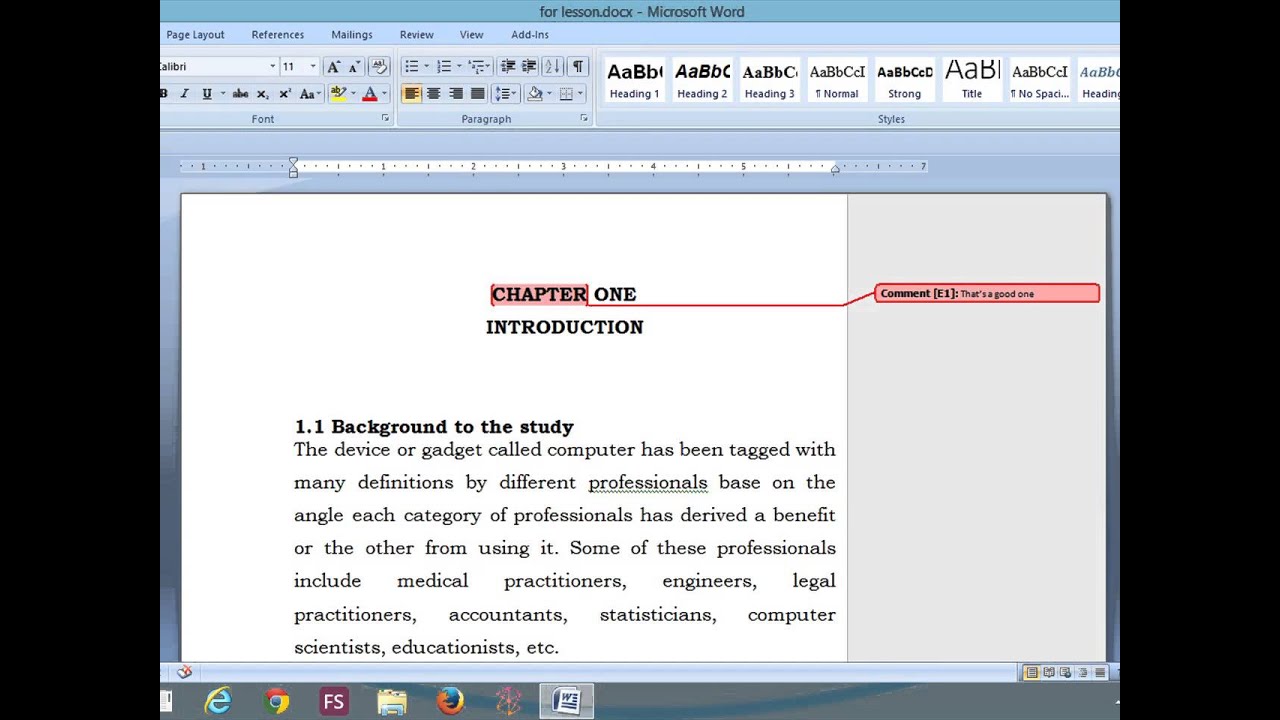
Markup areas in Word are sections of a document that display revisions, comments, and other annotations made during the editing process. These can include:
- Inserted comments that offer feedback or suggestions.
- Track changes that show what edits have been made.
- Highlighted text that indicates areas needing attention.
While these features are beneficial in collaborative settings, they can overwhelm the final document's appearance. Therefore, knowing how to remove a markup area in Word can be quite useful.
Why Would You Need to Remove a Markup Area in Word?
There are several reasons why you might want to remove markup areas from your Word document:
- Finalizing Documents: Before submitting or sharing your work, it’s essential to present a clean, professional version.
- Enhancing Readability: Excessive comments and revisions can distract readers from the main content.
- Personal Preference: Some users prefer a simpler, less cluttered view of their documents.
How Can You Remove Individual Markup Areas in Word?
Removing individual markup areas is straightforward. Here’s how:
- Open your Word document.
- Locate the markup area you want to remove, such as a comment or a revision.
- Right-click on the comment or revision.
- Select “Delete Comment” or “Accept/Reject Change” depending on what you want to remove.
This method allows you to selectively clean up your document without removing all markup areas at once.
Can You Remove All Markup Areas at Once?
If you’re looking to clear everything in one go, this method is efficient:
- Open your document in Word.
- Navigate to the “Review” tab on the ribbon.
- Click on “Accept” and choose “Accept All Changes” or “Reject All Changes” based on your needs.
- To remove comments, click “Delete” in the same tab and select “Delete All Comments in Document.”
This approach is excellent for finalizing documents, ensuring all markup areas are removed simultaneously.
Are There Settings to Disable Markup Areas in Word?
Yes, you can adjust settings in Word to minimize how markup areas appear. Here’s how:
- Go to the “File” menu and select “Options.”
- Click on “Display” in the Word Options dialog box.
- Under “Always show these formatting marks on the screen,” uncheck any options that you don’t want to see.
By disabling specific display options, you can work without the distraction of markup areas.
What If You Want to Keep Markup Areas for Future Reference?
If you need to maintain markup areas for future reference while still presenting a clean document, consider these options:
- Save a copy of your document with markup areas intact for future editing.
- Use the “Print” function to create a version with comments for review purposes.
- Utilize the “Compare” feature in Word to keep track of changes over time without cluttering your main document.
How to Save a Clean Version of Your Document?
To save a version of your document without the markup areas, follow these steps:
- Once you’ve removed the markup areas as desired, go to “File.”
- Select “Save As” and choose a new file name or location.
- Ensure you select the option to save in Word format to maintain document integrity.
This way, you’ll have both a clean version and an annotated version for future reference.
Conclusion: Perfecting Your Word Document
Mastering how to remove a markup area in Word is a valuable skill that can enhance the clarity and professionalism of your documents. Whether you’re finalizing a report or preparing a presentation, knowing how to manage markup areas effectively will streamline your workflow and improve readability. As you become more familiar with Word's features, you can confidently navigate between drafting and finalizing your documents, ensuring they always look their best.
Remember, the ability to remove or retain markup areas lies within your control. By following the steps outlined in this guide, you can maintain a clean and polished document that truly reflects your work quality.
Exploring The Divine: Who Described Angels In The Bible?
Exploring The Golden Era: Black Movies In The 90's
Mastering The Art Of Renaming Your Facebook Page


